Brownells BRN-180 Build Part 4: Custom Wood Grip

I can say with great satisfaction that part 4 of this build went relatively smoothly and after this post the shaping portion of this wood grip was completed! After carving out the inside and drilling the holes in part 3, I thought long and hard about the best way to start shaving the block down to size. I did a lot of research and decided the tool I needed was a table style oscillating belt/spindle sander, and I didn't own one.

After doing some research and reading a lot of reviews I chose the Ridgid oscillating sander. It had great reviews and a lifetime warranty. After assembling the new tool, I got to work!

I had the block securely attached to the lower receiver and then used a pencil to trace the shape of the lower onto the block.


After removing the grip from the lower I noted one side was parallel to the lower receiver and one was not. 
I determined I could work all of the front, back and bottom portion of the grip while keeping the side which was parallel to the lower receiver down on the sanding bed; and by doing so it would keep things nice and square while sanding it down closer to the desired size. I wrote a little "FD" on the square side so I could remember to keep that side "face down."


After tracing the Magpul grip as template on top of the wood grip, I started the sanding by hitting all of the spots where I could sand it down in flat straight lines.
I started to use the rounded potion of the belt to carve out some of the inner radius' of the front portion of the grip but I noticed quickly it was not sanding square to the FD surface. I figured out, as I moved the grip to the forward edge of the sanding belt, I was applying pressure to the part of the table which was not adjusted to be square. And I learned as long as I maintained pressure on the table which I had adjusted to be square to the belt sander it would maintain a nice square edge.
Several times while sanding I had to re-trace the Magpul grip because the sanding and the sawdust and my hands would wear off the lines.
I switched over to the drum wheel and squared it to the table.
The drum did an excellent job knocking down the inner radius of the grip.
I continued to use the lower receiver to make sure I could get the rear portion of the grip to line up perfectly, and used the drum to shave it down flush.
I noticed after sanding the upper/rear portion of the grip it created a hump on the rear portion of the grip. I put the belt back on and knocked the hump down flat.
After flattening out the hump on the rear of the grip, it was time to sand down the left and right side. I started by using the micrometer to find the center (based on where it was milled out for the lower receiver) and then measure to the sides to mark the parameters. 


I started by trying to use the drum attachment but I found pretty quickly it took off too much material too quickly and was doing it in a very non-uniform way. I decided a Dremel with a drum sanding attachment would work better. 


I used the belt sander to sand the sides down to the lines I had drawn.
I continued to place the grip back on the lower receiver and sanded down the top side portion of the wood until it was perfectly flush with the lower.
Once every side was the sanded down flat, it was time to carve the edges down to a more rounded and natural shape. I used my finger as a guide and drew some lines to act as a guide while I sanded the edges down.
The Dremel did an awesome job bringing the edges down to where I wanted them. I started with a corse 80 grit drum and ended with a 320 grit drum.
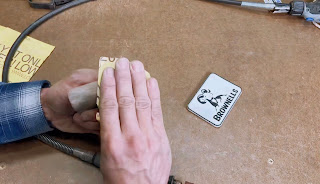
The last step to the shaping process was the hand sanding. I used 220 grit sandpaper and sanded it until it was very smooth and uniform.
Of course after I spent hours working on this walnut grip, and get it to the final stage, I drop it! The grip landed right on the top forward edge and dented the wood, leaving a small gap which was not there before I had dropped it. I considered using water or steam to raise/swell the wood in that area but decided it would be a good reminder of my imperfection (only Jesus was perfect) and left it alone.
Despite the small dent, I am thrilled with how well the grip turned out. The grip is smooth, symmetrical, mounts very solidly to the receiver, feels fantastic in the hand and looks beautiful. I still need to finish the wood and I have one other big surprise in store for this grip, but you will have to check back in to find out what it is.
If you want to watch this Vlog post, you can find it on YouTube here;
If you want to buy one of these awesome BRN-180 lower receivers, you can find it at the following link;
It helps out me out when you use the affiliate link to Brownells so thank you if you do! (it doesn't cost you anything)
Remember, Faith Kills Fear!


Comments
Post a Comment